Overview
This guide walks you through creating your first working SMTP mail account in Virtual Mailer, starting from the main form. When you finish, you will have a saved Mail Account that has been tested with a real test message.
This how-to covers the standard SMTP send method only. It does not require Tracking & Unsub... or Bounce Settings....
Before You Begin
Have these details ready from your email provider or mailbox administrator before you open the Mail Account Editor:
- The outgoing mail server name for SMTP, such as
smtp.yourdomain.com - The SMTP port your provider requires
- The encryption setting your provider requires
- Whether the server requires authentication
- The SMTP user name exactly as your provider shows it
- The SMTP password or other SMTP credential your provider tells you to use
- A descriptive name you want to use for this account inside Virtual Mailer
- A test email address you can access so you can confirm the test message arrives
If your provider does not specify an SMTP port, start with 587.
Important default values for a new SMTP account
Send Methodstarts asSMTPPortstarts at25, but587is the most common SMTP submission port and465is also commonServer requires autheticationstarts checkedEncryptionstarts asNone- Send throttling starts at
25messages per session with a10second pause
Replace those defaults with the values from your actual mail account settings before you test the account.
Step-by-Step Instructions
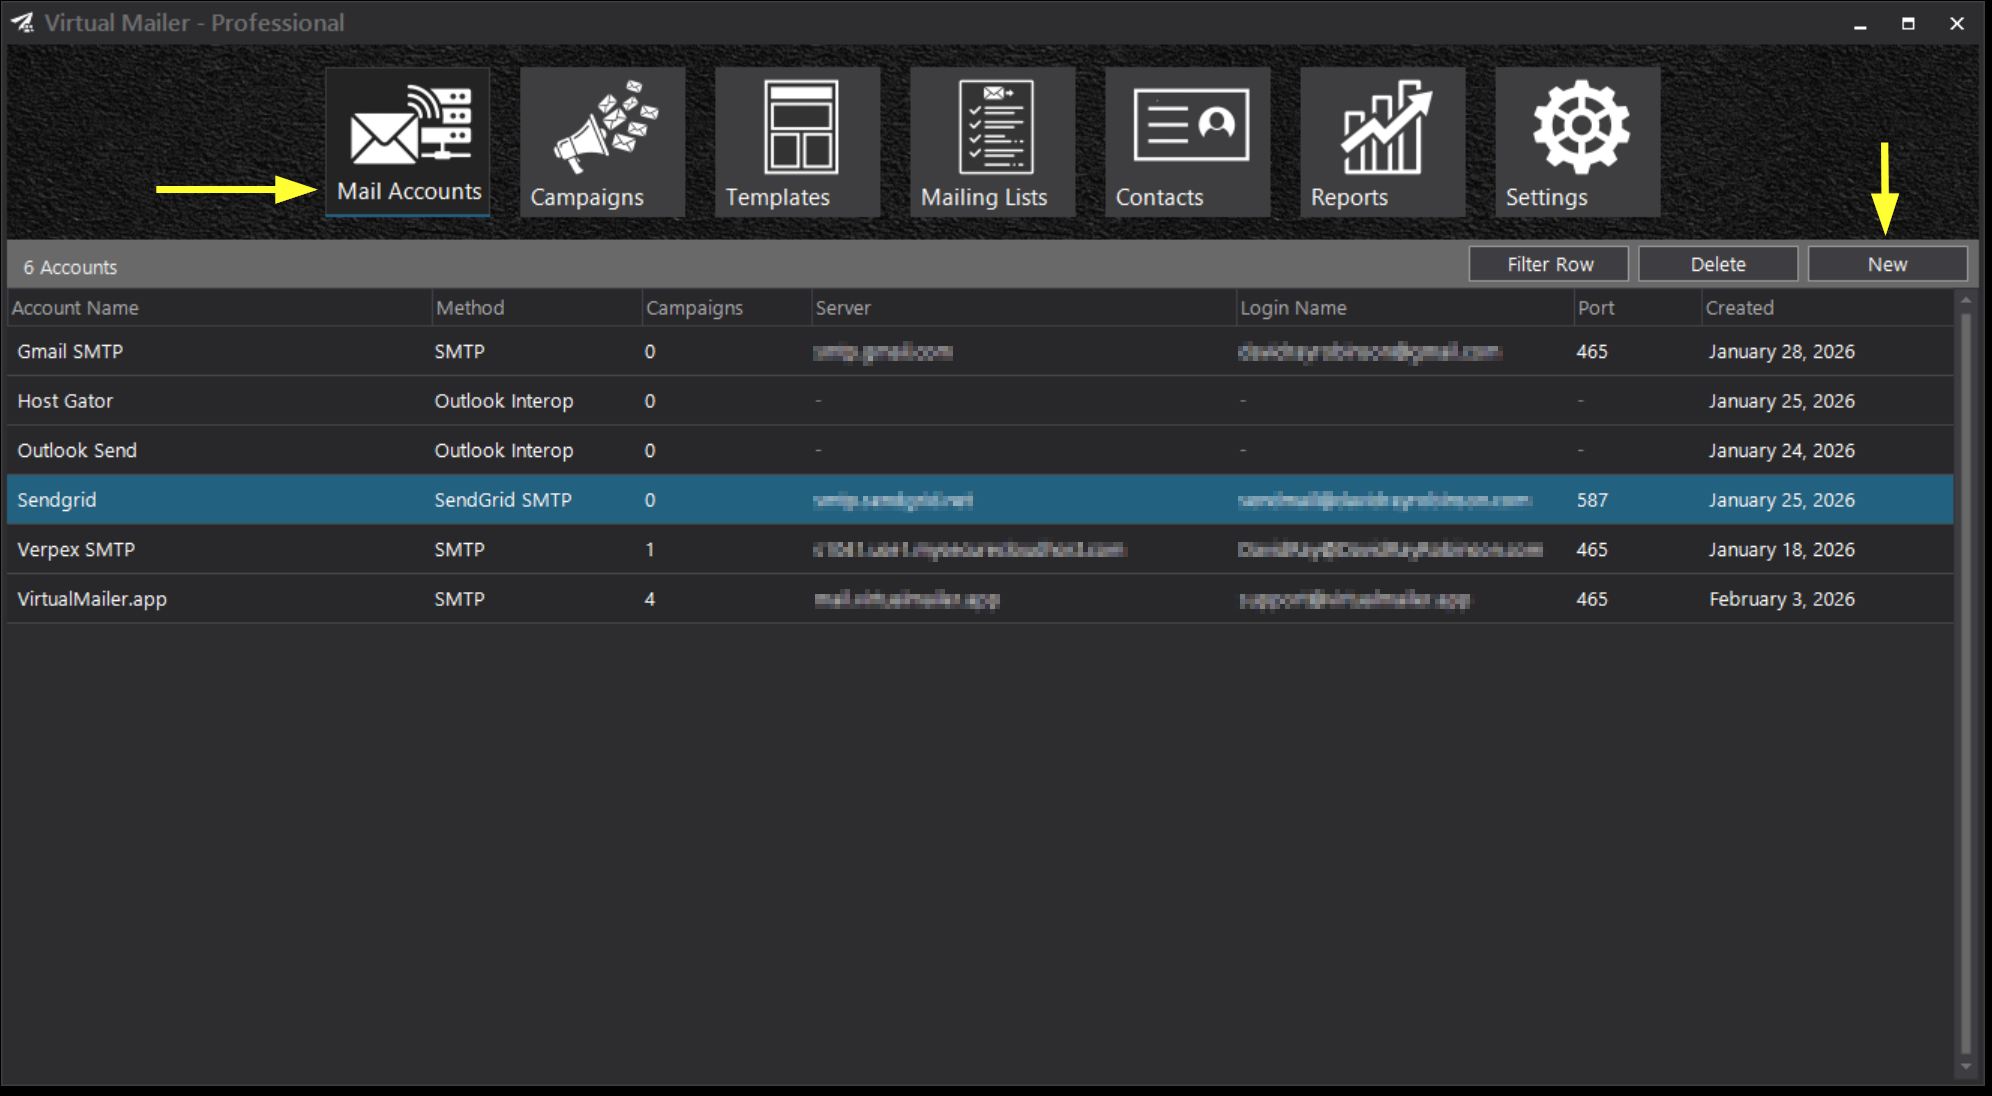
- Open Virtual Mailer and go to the main form. The
Mail Accountstile is selected by default when the main form loads. If you are on another module, clickMail Accounts. - In the
Mail Accountsscreen, clickNew.
- In
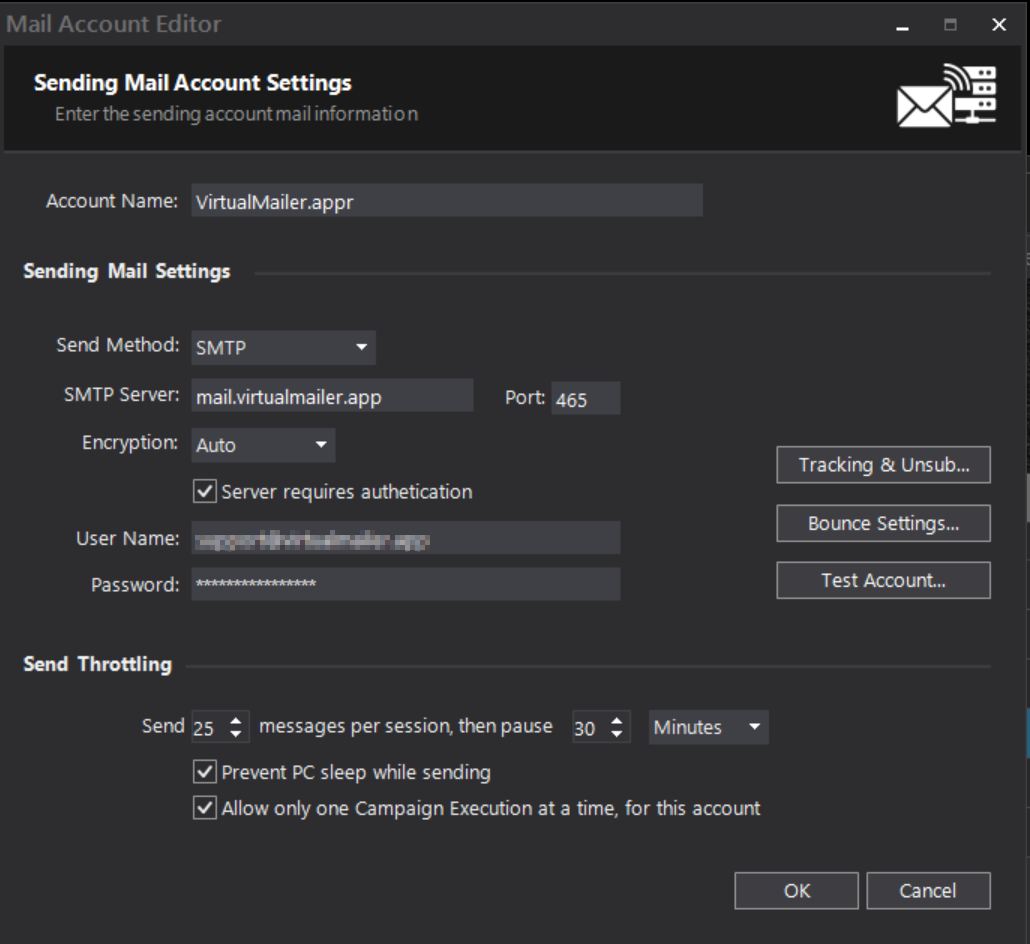
Mail Account Editor, enter anAccount Name. - Confirm that
Send Methodis set toSMTP. -
Enter the SMTP connection details from your provider:
SMTP Server
Enter the outgoing mail server host name exactly as provided.Port
Replace the default value if your provider uses a different port. For most providers, try587first because it is the most common SMTP submission port.465is also commonly used. Use25only if your provider specifically tells you to use it.Encryption
Choose the exact encryption option your provider requires. Most providers will require encryption. If your provider does not specify one, tryAutofirst. A new SMTP account starts withNone, so change it if your provider requiresAuto,TLS 1.2, orTLS 1.3. -
Review the
Server requires autheticationcheckbox.- Leave it selected if your provider requires a login, which is the default for a new account.
- Virtually all providers will require login information unless your mail server is hosted on a private network.
- Clear it only if your provider specifically says this SMTP server does not require authentication.
- If authentication is required, enter
User NameandPassword. - Review the throttling section near the bottom of the form. For a first test account, you can usually leave the defaults in place unless your provider gave you different sending limits:
Send 25 messages per sessionandWait 10 Seconds. - Click
Test Account....
-
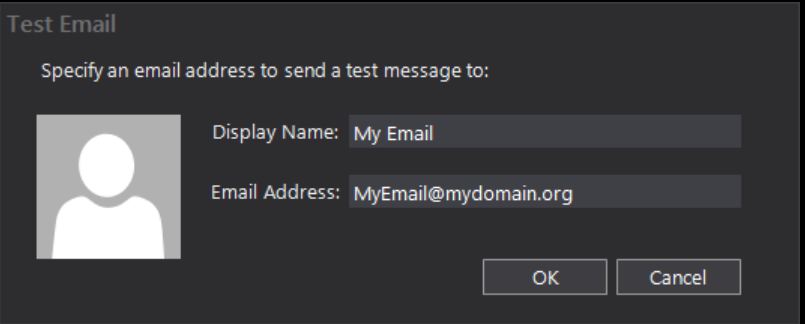
In the
Test Emaildialog, enter:Display Name
This is optional for the test.Email Address
Enter a valid email address you can check immediately after the test. - Click
OKin theTest Emaildialog.
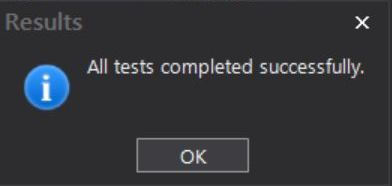
- Wait for the test to finish. If the test succeeds, Virtual Mailer shows this results message:
All tests completed successfully. - Click
OKinMail Account Editorto save the account and close the form.
Settings Explained
Account Name
This is the internal name for the Mail Account inside Virtual Mailer. Use a name you will recognize later, such as Office 365 - Sales or Website SMTP - Support.
Send Method
For this guide, use SMTP. If you choose another send method, the visible fields change and the SMTP-specific fields may be hidden.
SMTP Server
Enter the SMTP host name from your email provider's account settings. This should be a mail server name, not a website URL.
Port
Enter the SMTP port from your provider's settings. A new account starts at 25, but for most authenticated SMTP accounts you should try 587 first because it is the most common submission port. 465 is also common. Use the value your provider gives you, even if it is different from the default.
Encryption
Available options are None, Auto, TLS 1.2, and TLS 1.3. New SMTP accounts start with None. Do not leave that value in place unless your provider's settings say to use no encryption.
Server requires authetication
When this checkbox is selected, User Name and Password are required before OK and Test Account... can be used. When it is cleared, those two fields are disabled.
User Name
Enter the SMTP login name from your provider's settings exactly as it is shown there. For many SMTP providers this is the full email address, but you should use the exact value your provider gives you.
Password
Enter the SMTP credential required by your provider for that account.
Send X messages per session
This controls how many messages Virtual Mailer sends before it pauses. A new account starts at 25.
Wait Y Seconds, Minutes, or Hours
This controls the pause between batches. A new account starts at 10 Seconds.
Prevent PC sleep while sending
Enable this only if you want Windows to stay awake during long sends.
Allow only one Campaign Execution at a time, for this account
This starts enabled for new accounts. Leave it enabled unless you have a specific reason to let multiple campaign executions use the same account at the same time.
Expected Result
- The test finishes with the message
All tests completed successfully. - The Mail Account is saved when you click
OK - The new account appears in the
Mail Accountsgrid
Troubleshooting
OK or Test Account... stays disabled
Virtual Mailer enables these buttons only after the visible required fields are valid.
Account Nameis not blankSend Methodis selected- If
SMTP Serveris visible, it is not blank - If
Portis visible, it contains a number greater than0 - If
Server requires autheticationis selected, bothUser NameandPasswordare filled in - The throttling values are valid
The Test Email dialog OK button stays disabled
The Email Address field must contain a valid email address before the dialog can continue.
The results dialog says the test message failed
Virtual Mailer shows: There was an error sending the test message, please check the log files for detailed information.
For a first SMTP setup, re-check the values you entered from your provider's account settings:
SMTP ServerPortEncryptionServer requires autheticationUser NamePassword
You try to close the editor and Virtual Mailer asks whether to save
If you changed the account but did not click OK, Virtual Mailer prompts you to save before closing. Choose Yes to save the account, No to close without saving, or Cancel to return to the editor.
FAQ
Do I need Tracking & Unsub... to create my first SMTP account?
No. It is not required for a basic SMTP account setup or for Test Account....
Do I need Bounce Settings... to create my first SMTP account?
No. It is optional and not required for your first working SMTP account.
What should I use for Account Name?
Use a descriptive internal name that helps you recognize the account later.
What if my provider does not require authentication?
Clear Server requires authetication. When that checkbox is cleared, User Name and Password are disabled and are not required to save or test the account.
What should I use for the test email address?
Use a mailbox you can open right away so you can confirm the test message arrives.
Why should I review the Encryption field instead of leaving the default?
Because new SMTP accounts start with None. If your provider requires encryption, you must change it before you test the account.
Related Topics
- Mail Account Editor
- Send Method Selection
- Guide Email Tracking Setup
- SendGrid Setup Guide